How-to Use Google Search Console
How-to Use Google Search Console
Setting Up Google Search Console
- Sign in to your website’s Google account.
- Click on the “Add property” dropdown menu. Alternatively, you can type your website’s URL in the text box under Domain and click continue.
- Your site should now be added to Google Search Console.
- Verify your site to prove that you are the owner or an authorized user by first clicking on Manage property next to your website on the GSC dashboard. There are multiple ways of verification:
Why use Google Search Console?
Google Search Console allows you to:
- Submit an xml sitemap to ensure all your web pages are discovered and indexed on Google
- Discover errors on your website that may be hurting your SEO ranking
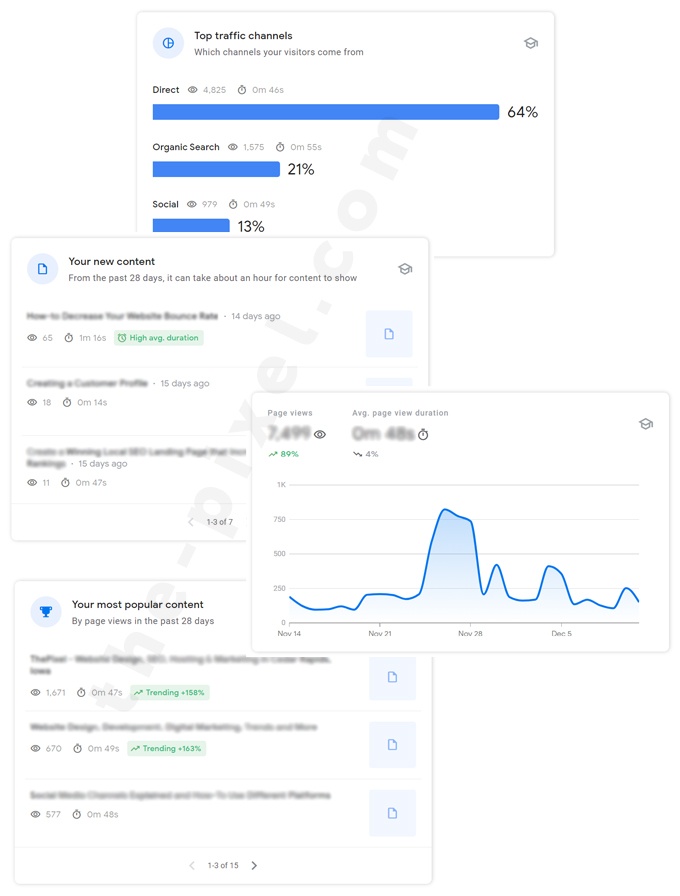
- Monitor your keyword ranking and whether your clicks are increasing or decreasing per keyword
- Confirm that Google can access your website’s content
- Submit your pages for faster crawling and indexing
- Monitor malware warnings and file reconsideration requests
- Discover how your website is viewed by search engines
- Determine which keywords your website currently ranks for
1. Use Google Analytics
Select Google Analytics tracking code under Recommended method. If you already have a Google Analytics account tied to your website, you just have to click Verify. If it doesn’t work, check the HTML of your site’s homepage to see if the GA code is in the ‘header’ section. Finding your GA code.
2. Add HTML Tag
Select HTML tag under Alternate methods. Copy the provided meta tag on GSC then paste it in the ‘header’ section of your site’s homepage, then save the updated HTML. Go back to GSC and click on Verify.
3. Upload HTML
Select HTML file upload under Alternate methods. Download the provided HTML file, then upload it to the specified direction. Go back to GSC and click on Verify.
Select Google Tag Manager under Alternate methods. If you already have GTM code in your site’s HTML code and have “View, Edit, and Manage” permissions enabled in your GTM account, all you have to do is click Verify.
- Click Crawl on the dropdown menu in the GSC dashboard, then click Sitemaps, then click Add/Test Sitemap.
- Type “system/feeds/sitemap” in the text box that appeared, then click Submit Sitemap.
Your website should now be all set to use with GSC.
Select Google Tag Manager under Alternate methods. If you already have GTM code in your site’s HTML code and have “View, Edit, and Manage” permissions enabled in your GTM account, all you have to do is click Verify.
4. Use Google Tag Manager
Select Google Tag Manager under Alternate methods. If you already have GTM code in your site’s HTML code and have “View, Edit, and Manage” permissions enabled in your GTM account, all you have to do is click Verify.
- Click Crawl on the dropdown menu in the GSC dashboard, then click Sitemaps, then click Add/Test Sitemap.
- Type “system/feeds/sitemap” in the text box that appeared, then click Submit Sitemap.
Your website should now be all set to use with GSC.
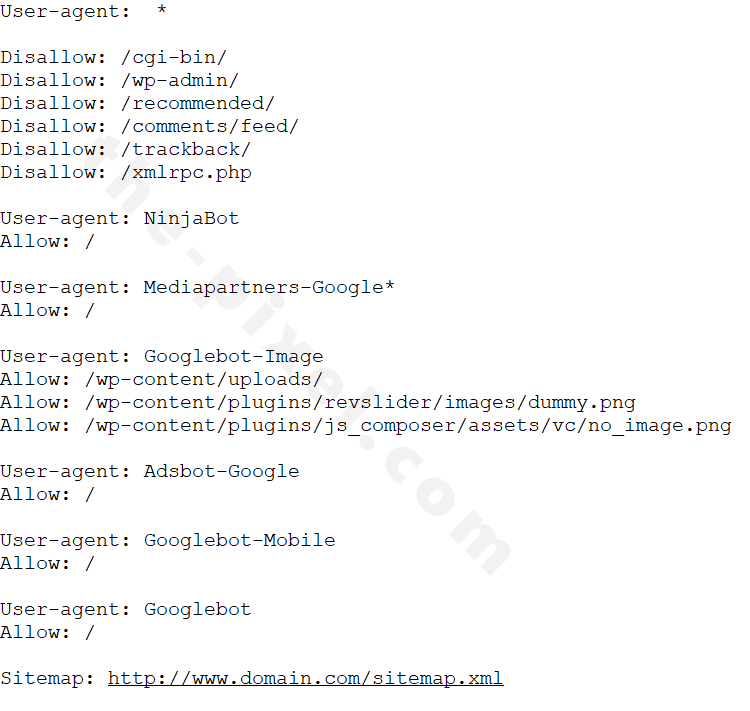
5. Robots.txt
One other thing you might want to check before diving into the details of GSC is your site’s robots.txt file. This file can tell Google what pages on your site you don’t want to be indexed.
- Click Crawl in the dashboard, then robots.txt Tester. It should show your robots.txt file and if there are any errors. You can also edit it with this tool.
- Click Submit once you’re done making changes, and GSC should give you a copy of the updated robots.txt.
- Upload the new version to your site in the root domain (www.yoursite.com/robots.txt)
- Click Verify live version in the Tester tool for confirmation and to tell Google to crawl your site to see the changes.
When creating or changing your robots.txt file you really must test it thoroughly using this tool. Adding a robots.txt file that has errors will likely seriously impact your site’s ability to get crawled and indexed, which can cause it to fall out of the search rankings. You could even wind up blocking your entire site from appearing in search results!
Hire ThePixel to build your next website!
Since our founding in 2008, we’ve created and launched many types of business websites. Over the last decade and we’ve learned a thing or two! That’s why we’re masters of our craft, let us help you build the website of your dreams – one that generates traffic, leads and conversions.

Are you ready to start? If yes, contact ThePixel and one of our representatives will guide you through the website phases and how the process works either by a Zoom Meeting or phone.